과목명 : 모바일 프로그래밍(Mobile programming with Android Studio)
수업일자 : 2023년 03월 10일 (금)
- 2주 차 수업 당시, 실습 및 프로젝트 진행을 위한 Android Studio 설치 및 개발 환경 설정을 진행하게 되었습니다.
1. Android Studio installation
1-1. Android Studio
- 공식 URL : https://developer.android.com/studio/install?hl=ko
- 해당 홈페이지에서 운영체제에 맞게 Android Studio를 설치할 수 있습니다.
Android 스튜디오 설치 | Android 개발자 | Android Developers
Windows, macOS 또는 Linux에서 Android 스튜디오를 설정 및 설치합니다.
developer.android.com
1-2. JDK(Java Development Kit) installation
- 공식 URL : https://www.oracle.com/kr/java/technologies/java-se-glance.html
- ORACLE 공식 홈페이지에서 JDK(Java Development Kit)까지 반드시 설치해야 합니다.
Java SE | Oracle Technology Network | Oracle 대한민국
Java SE at a Glance Java Platform, Standard Edition (Java SE) lets you develop and deploy Java applications on desktops and servers. Java offers the rich user interface, performance, versatility, portability, and security that today's applications require.
www.oracle.com
1-3. JDK가 설치되어 있는지 확인하는 방법
(1) Windows 기준
- [Windows] + R → cmd 접속 → java -version으로 version 확인

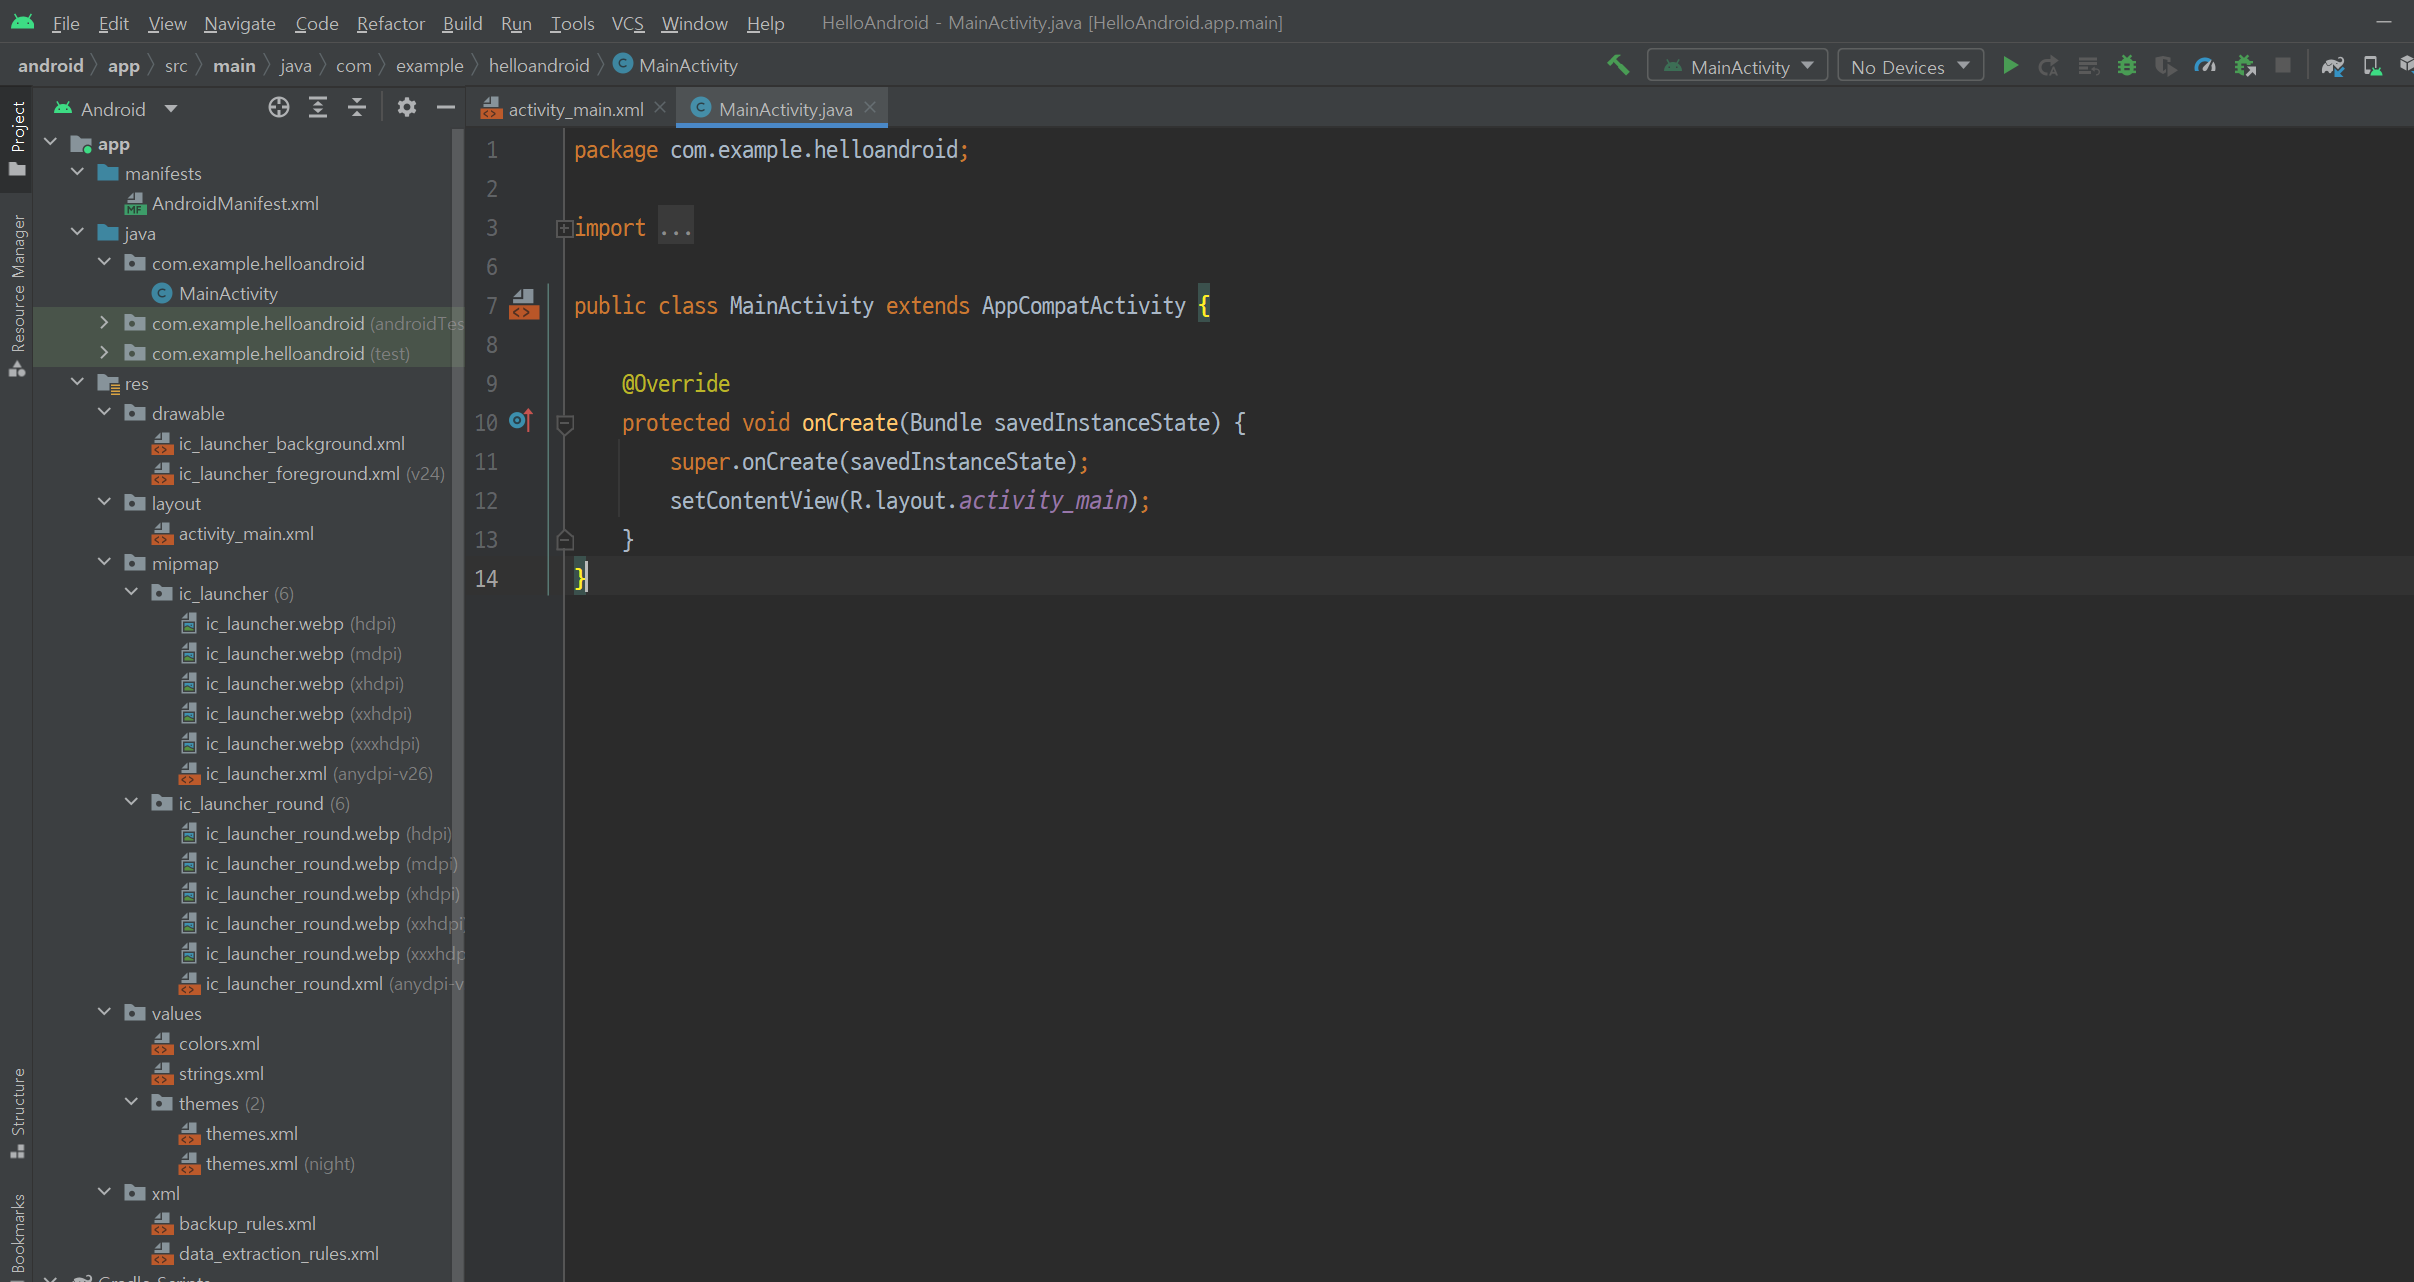
2. Android Studio 실행
2-1. activity_main.xml
- helloandroid 프로젝트 파일을 생성한 이후의 activity_main.xml

2-2. MainActivity.java
- helloandroid 프로젝트 파일을 생성한 이후의 MainActivity.java
3. 개발 편의성을 위한 Plugin, Settings
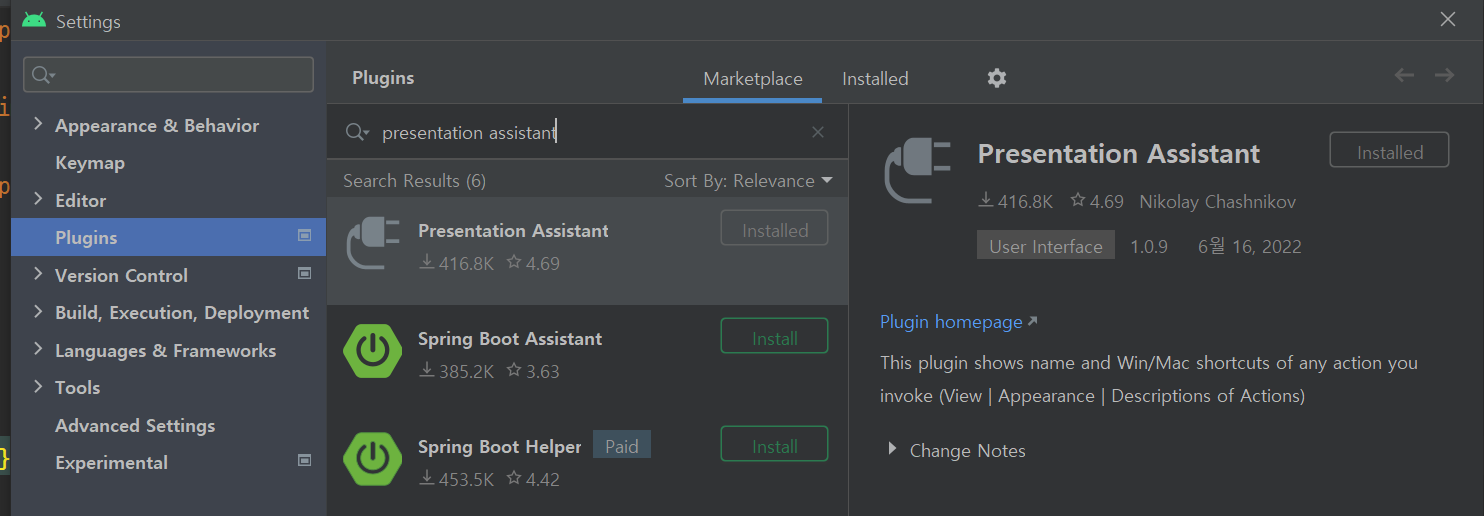
3-1. Plugin 설정 : 누른 단축키를 출력시키는 Presentation assistant
Settings(Ctrl + Alt + s) → Plugin → Presentation assistant 설치 후 Enable

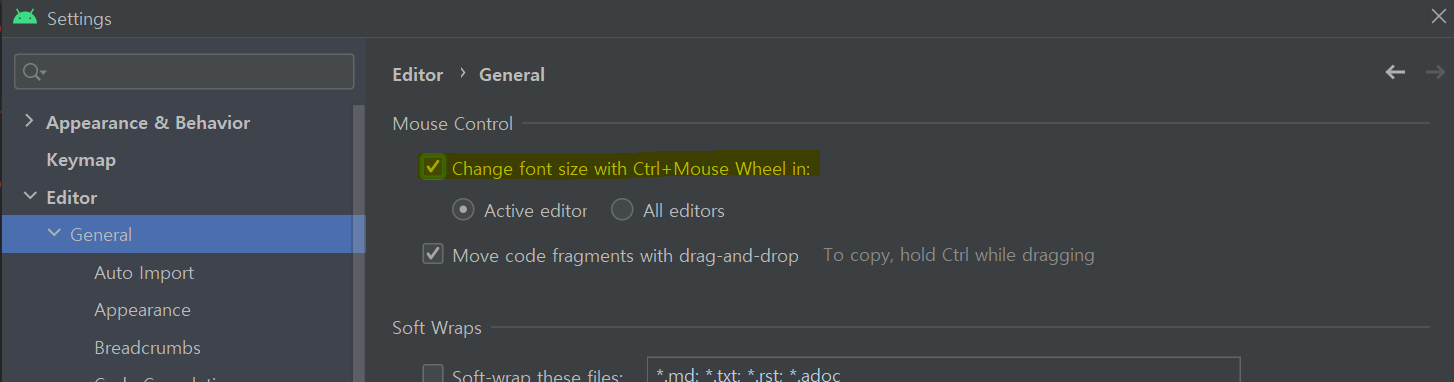
3-2. Settings 설정 : Wheel 스크롤을 이용한 Editor, Console font 크기 조정
Settings(Ctrl + Alt + s) → Editor → General → "Change font size with Ctrl + Mouse Wheel in [Checking]
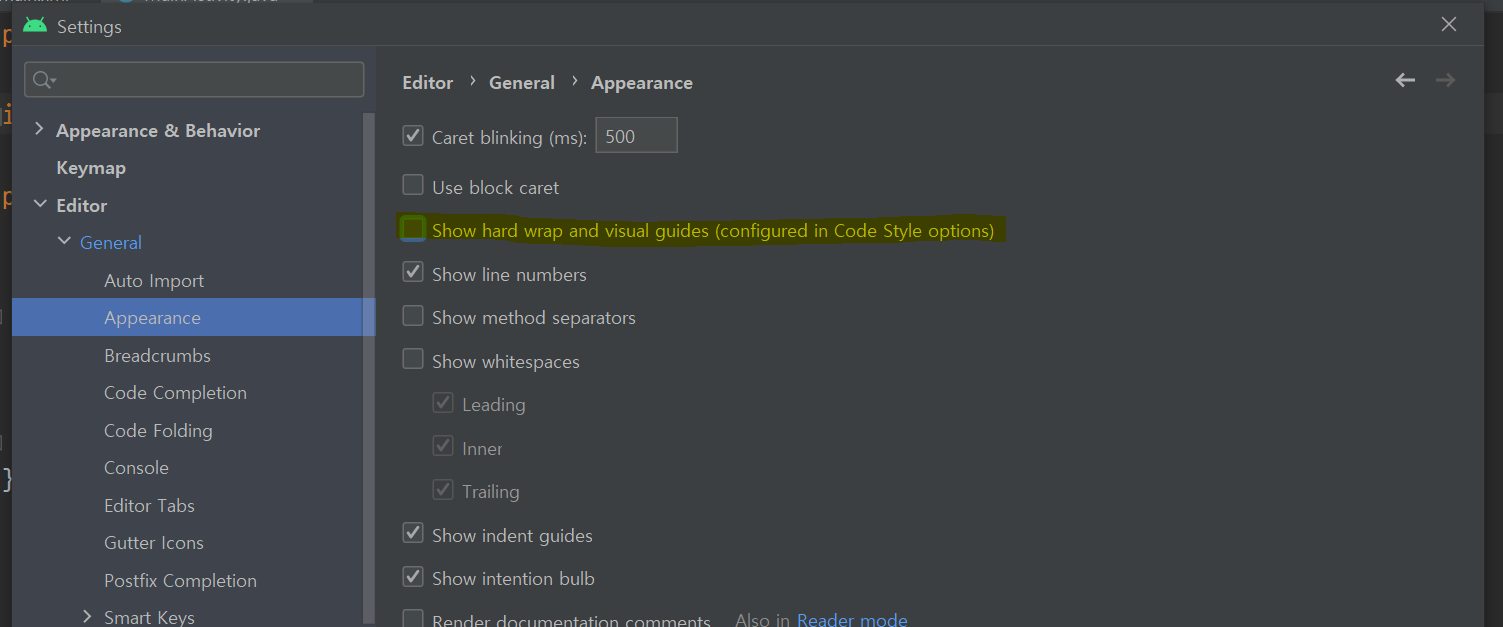
3-3. Code Editor에 존재하는 Visual guides 제거
Settings(Ctrl + Alt + s) → Editor → General → Appearance → "Show hard wrap and visual guides (configured in Code Style options) [Unchecking]
- 학부에서 수강했던 전공 수업 내용을 정리하는 포스팅입니다.
- 내용 중에서 오타 또는 잘못된 내용이 있을 시 지적해 주시기 바랍니다.


댓글